One free pattern, every Thursday — join thousands of makers.

Get the weekly pattern

Tasty Crochet

Category: Crochet Patterns

  • 15 Easy Amigurumi Crochet Patterns for Absolute Beginners

    15 Easy Amigurumi Crochet Patterns for Absolute Beginners

    There is a specific reason beginner crocheters gravitate to amigurumi, and it is not that the patterns are easy. It is that they are short. A single crochet round takes forty seconds. There is no back to work, no second sleeve, no row you have to count three times. You finish something in an evening, and finishing something is what makes you keep going.

    These fifteen patterns are sorted by stitch count and shaping complexity, not by how popular they are on social media. Everything in the first five uses single crochet and one decrease. Nothing here requires you to work in the round with a double crochet spiral, embroidery, or plastic safety eyes — all of which are excellent but all of which are second-project skills.

    If you have not worked single crochet in the round yet, make numbers 1 and 2 below first — they need no shaping at all. And if you have never closed a piece, start at number one on this list rather than jumping to the llama. If you want a flat warm-up project first, the beginner pattern roundup is the better starting line.

    Why amigurumi is the right first 3D project

    Amigurumi is Japanese crochet worked in continuous spirals with a single stitch and frequent decreases. Three properties make it ideal for a beginner:

    • It grows one round at a time. You can see the shape forming and stop whenever you like. A half-finished piece is still a recognizable object.
    • Decreases do the shaping. If you can make two stitches into one, you can make almost anything in this list.
    • Failure is cheap. A failed round costs three minutes of unpicking. There is no set-in sleeve to unpick for six hours.
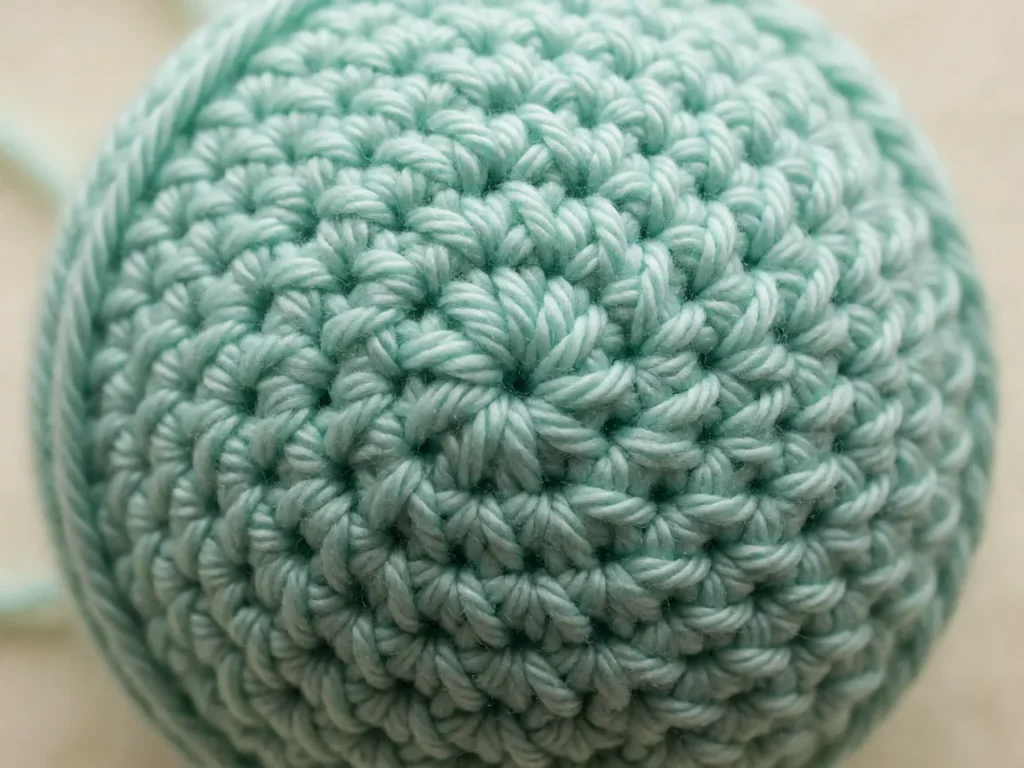
    Close-up of a crocheted ball showing a visible spiral seam where each round of single crochet joins the previous one

    Tension notes before you buy yarn

    Amigurumi demands tight stitching. This is the single biggest reason beginner amigurumi comes out lumpy and holey, so read this before you start:

    • Use a hook one size smaller than the label suggests. Amigurumi is worked tighter than garments. A 3.5mm hook with DK yarn usually gives a firm, hole-free surface where the label hook leaves gaps.
    • Stuff as you go, lightly. Overstuffed pieces bulge between the decreases and distort the shape. Polyester stuffing packs tighter than fibrefill; use less than you think.
    • If pieces curve or cone upward, your tension is too loose. This is the classic beginner error and it is not fatal — go down a hook size rather than pulling harder, which tightens your hands and creates hand strain.
    • Measure your gauge on the round. Circle gauge does not behave like flat gauge, which is why our gauge guide explains why flat swatches mislead amigurumi.

    The 15 patterns

    1. Jellyfish with Tentacles — 1 stitch type

    Vocabulary: chain, single crochet, slip stitch.
    Yarn: DK cotton or acrylic.
    Time: 90 minutes including tentacles.

    A dome worked in plain single crochet rounds, then chain tentacles left loose. There is no decrease to learn and nothing to shape. The tentacles hide every imperfection in the dome, which makes this the right very first piece.

    2. Round Puffball — 1 stitch type

    Vocabulary: chain, single crochet, slip stitch.
    Yarn: Any weight, scrap yarn is fine.
    Time: 20 minutes.

    Twenty minutes, four decreasing rounds, done. If you want to learn the decrease mechanic without committing to an object that has to look like something, make two of these.

    3. Octopus with Curling Arms — 1 stitch type

    Vocabulary: chain, single crochet, single crochet decrease.
    Yarn: DK acrylic.
    Time: 2 hours.

    The same dome as the jellyfish, plus eight chain arms. Arms are the easiest possible place to hide loose tension because they hang rather than stand.

    4. Seahorse — 2 stitch types

    Vocabulary: chain, single crochet, single crochet decrease, single crochet increase.
    Yarn: DK cotton.
    Time: 2.5 hours.

    Your first use of increase — one stitch becoming two. A seahorse is mostly increases through the body and a snout of tight decreases at the head. Simple silhouette, so the shaping is forgiving.

    5. Simple Whale — 2 stitch types

    Vocabulary: chain, single crochet, single crochet decrease, slip stitch.
    Yarn: DK worsted acrylic.
    Time: 2 hours.

    A whale is an ellipsoid: rounds that increase, rounds that hold, rounds that decrease. It is the purest possible demonstration of how amigurumi shaping works, and it looks convincingly like a whale with no embroidery.

    6. Cupcake with Frosting — 2 stitch types

    Vocabulary: chain, single crochet, single crochet decrease, colour changes.
    Yarn: Two colours, DK.
    Time: 2 hours.

    The wrapper is a straight cylinder and the frosting is three decrease rounds worked in a second colour. Colour changes are the only new mechanic, and they are trivial: work the last stitch of a round in the new colour.

    7. Mini Ghost — 2 stitch types

    Vocabulary: chain, single crochet, single crochet decrease.
    Yarn: White DK acrylic.
    Time: 75 minutes.

    A cylinder that flares at the base. The flare is achieved by placing two stitches in every stitch along the final round, which is the easiest possible increase technique.

    8. Froggie Pocket Pal — 2 stitch types

    Vocabulary: chain, single crochet, single crochet decrease, single crochet increase.
    Yarn: DK green acrylic.
    Time: 2.5 hours.

    Slightly larger, with four limbs worked as separate small pieces and sewn on. This is your first assembly job: four attachments and two eyes. Twenty minutes of finishing on top of ninety minutes of crocheting.

    9. Penguin with Beanie — 3 stitch types

    Vocabulary: adds half double crochet for the beanie brim.
    Yarn: DK black, white and red.
    Time: 3 hours.

    Three colours and one new stitch. The body and head are one continuous piece, which is the trick that makes it look good. Worth attempting once you have made two of the above without frustration.

    10. Snail with Swirl Shell — 3 stitch types

    Vocabulary: adds double crochet for the shell spiral.
    Yarn: DK in two colours.
    Time: 3 hours.

    The shell is worked as one continuous spiral of alternating colour rounds rather than as separate stitches, which is what gives it the swirl. It is the first pattern on this list that rewards concentration over speed.

    11. Bumblebee Keyring — 3 stitch types

    Vocabulary: chain, single crochet, double crochet, decrease, increase.
    Yarn: Two colours, DK.
    Time: 2.5 hours.

    A body, two striped wings in the round, and a keyring through the loop at the top. Small enough to finish quickly, and it is the first pattern here that is designed as an object to carry rather than a toy to display.

    12. Sleeping Cat — 4 stitch types

    Vocabulary: chain, single crochet, half double crochet, decrease.
    Yarn: DK worsted.
    Time: 3 hours.

    A curled body in half double crochet with a separate head and two front paws. The half double stitch is fatter, which is exactly right for a cat, and it is the stitch that makes 3D pieces look solid rather than lacy.

    13. Mushroom with Spots — 4 stitch types

    Vocabulary: chain, single crochet, double crochet, decrease, increase.
    Yarn: DK in two or three colours.
    Time: 3 hours.

    A straight cylinder stem and a wide decrease cap. The cap relies on a steep decrease rate, which is where a beginner’s tension is most visible — go down a hook size if the cap domes rather than flattening.

    14. Llama with Scarf — 4 stitch types

    Vocabulary: chain, single crochet, half double crochet, decrease.
    Yarn: DK worsted, plus a scrap of red.
    Time: 3.5 hours.

    The tallest piece here: a long neck means roughly forty rounds before you shape the head. That length is what makes it a genuine multi-session project, and it is why it is number fourteen rather than number one.

    15. Little Bird with Egg — 4 stitch types

    Vocabulary: chain, single crochet, double crochet, decrease, increase.
    Yarn: DK worsted, plus a scrap of white.
    Time: 3.5 hours.

    A body in double crochet, two wings, and a separate egg worked to fit inside it. The nesting detail is what sells it. A good final project: no new techniques, but enough shaping to feel like you have arrived.

    How to choose

    Pick by where you actually are, not by where you want to be in a month:

    • Never closed a piece? Numbers 1–3.
    • Comfortable with decreases? Numbers 4–8.
    • Working in the round confidently? Numbers 9–12.
    • Want a real project? Numbers 13–15.

    If your instinct is to start at fifteen, start at fifteen. You will learn the missing steps on the way and you will finish something you chose, which matters more than finishing something appropriate.

    Once these are behind you, the natural next step is joining motifs into something larger — start with the crochet blanket roundup. And if terms like sc2tog are slowing you down, our stitch meanings glossary covers every abbreviation used on this page.

    Frequently asked questions

    Why does amigurumi need tighter stitching than a blanket?

    Because it is stuffed. A loose amigurumi seam splits open the moment you push polyfill inside it, and a tight seam makes the shape hold. Most amigurumi patterns are worked in the round with a hook one size smaller than you would reach for on your own, and the fabric is meant to look slightly firm rather than drapey.

    Do I need a stuffing-free alternative?

    Only if the finished piece is for a small child. Stitch amigurumi tightly enough to hold its shape without fibre fill, and check for beads, safety eyes and long limbs — those are the parts that need removing, not the sewing. Everything on this page works as a sewn shape on its own.

    How do I keep the piece from curling as I work it?

    Work in the round without slipping stitches, mark the first stitch of each round, and count back to it rather than eyeballing the join. Amigurumi spirals for a long time — dozens of rounds — so a count you trust early is worth more than a correct-looking join that drifts.

    The weight classes recommended here follow the Craft Yarn Council standard yarn weight system, which is the scale most published patterns use when they say “dk” or “light”.

    Shaping a first limb and finding it does not sit right? Leave a comment describing the shape you wanted and I will work through it with you.
  • 10 Beginner Crochet Patterns Every New Crocheter Should Make

    10 Beginner Crochet Patterns Every New Crocheter Should Make

    The reason most people never finish a crochet project is not effort. It is that they start something too ambitious for the four stitches they can already work. A first blanket fails for the same reason a first crossword fails when you start with the Sunday edition: you skipped the easy part.

    Below are ten patterns to hand to a total beginner in this order. They are sorted by stitch count rather than by how cute they look, because stitch count is the only honest measure of difficulty available before you start. Every pattern below states its yarn weight, its stitch vocabulary, and roughly how long each one typically takes. If you can work a chain and a single crochet, you can finish at least the first five.

    Before you reach for the list, make sure you are comfortable with the mechanics in Crochet Stitch Meanings — specifically single crochet, since it does most of the work in this roundup. If terms like sc2tog make you close the tab, start with How to Read a Crochet Pattern instead and come back.

    What beginners can actually make

    Here is the honest capability ladder for a crocheter who can chain, work single crochet, and count their own stitches:

    • Flat fabric — anything worked in rows: dish cloths, bags, cushions.
    • Shaped decreases — anything that narrows: hats, cup cozies, beanies.
    • Small 3D shapes — amigurumi, once you can decrease and close a piece.
    • Joined motifs — granny squares, once you can sew or join as you go.
    • Garments — sweaters, only once you have made three of the above.

    Every pattern on this list lives in the first four rows. None of them require you to knit, follow a chart, or trust a designer.

    How to pick your first pattern

    Three questions, in order:

    1. How many stitch types does it use? Count the abbreviations in the pattern body. Under five is a comfortable first project. Over ten means you will be stopping to look things up every row.
    2. How many hours does it realistically take? Flat projects in cotton are fast. Shaped 3D pieces are slow because of finishing, not stitching.
    3. Do you want to see progress? Round and shaped pieces show you how they look every row. A flat rectangle stays a flat rectangle until the very end.

    And check the yarn weight before anything else. Patterns specify a weight class, not a brand. Our guide to choosing yarn for crochet explains what the weight numbers actually mean and what happens if you substitute a different one.

    The 10 patterns

    1. Puffy Coin Purse — chain only

    Stitch vocabulary: chain, slip stitch.
    Yarn: DK cotton or acrylic.
    Time: 45–60 minutes.

    This is a chain stitch and a slip stitch. That is genuinely the whole list. It is also the fastest confidence-builder in crochet because you cannot go wrong in a way you cannot see — the errors show up immediately as a twist.

    Make it because it teaches you to read your own work back to yourself. Read the slip stitch guide first.

    2. Simple Cotton Dish Cloth — chain and single crochet

    Stitch vocabulary: chain, single crochet.
    Yarn: Worsted weight cotton.
    Time: 60–90 minutes.

    The traditional first project, and it earns the slot. It is flat, it is fast, and it uses the one stitch you will use for the rest of your life. The only slightly awkward part is the turning chain at the end of each row — which is just a chain, so it reinforces what you already know.

    Make it because it produces something useful. Useful projects get finished.

    3. Striped Beanie in Single Crochet — with decreases

    Stitch vocabulary: chain, single crochet, single crochet decrease.
    Yarn: Worsted weight wool blend.
    Time: 3–4 hours.

    This is the first pattern that teaches you to make something smaller, which is the concept beginners resist most. A decrease is two stitches becoming one. Once that clicks, hat shaping stops being magic.

    Make it because it is the first project where the shape comes from the stitches rather than from the geometry.

    4. Basic Granny Square — joins

    Stitch vocabulary: chain, double crochet, chain.
    Yarn: Any weight, worsted is easiest.
    Time: 2–3 hours for one square.

    Two stitches, but a new skill: the join. You will learn to fasten off cleanly and re-attach, and that skill is required for almost everything you will ever make.

    Make it because granny squares are the gateway to blankets. Our crochet blanket roundup assumes you can make one of these.

    5. Two-Hour Bunny Plush — first 3D piece

    Stitch vocabulary: chain, single crochet, single crochet decrease, single crochet increase.
    Yarn: DK or sport acrylic.
    Time: 2–3 hours including assembly.

    Your first piece that closes. You will learn increases (one stitch becoming two), which is the inverse of what you learned on the beanie, and you will learn to stuff evenly.

    Make it because it is the project that makes crochet click. Everyone remembers their first finished toy. Our amigurumi roundup is the natural next stop.

    6. Flat Cotton Tote Bag — flat with a handle

    Stitch vocabulary: chain, single crochet, double crochet.
    Yarn: Worsted weight cotton.
    Time: 4–5 hours.

    Flat construction with a strap. Once you have made one, you can make a market bag, a library bag, or a book tote by changing the dimensions. This is the highest-value flat pattern on the list for repeat use.

    7. Spiral Scrunchie — first pattern with a working instruction

    Stitch vocabulary: chain, single crochet, single crochet decrease.
    Yarn: Lace or sport weight elastic-friendly yarn.
    Time: 60–75 minutes.

    A scrunchie is worked in a continuous spiral with stitch markers. It introduces a genuinely new skill: counting rounds, and noticing that you must decrease to keep the spiral flat rather than drifting outward.

    Make it because it is short enough to abandon guilt-free and teaches round construction.

    8. Square Cushion Cover — double crochet and seaming

    Stitch vocabulary: chain, double crochet, single crochet border.
    Yarn: Aran or bulky cotton.
    Time: 4–6 hours.

    Flat, quick, and it teaches a border. A tidy border is the difference between a handmade cushion that looks deliberate and one that looks abandoned. Once you can border, you can finish anything.

    9. Ribbed Cup Cozy — back-loop only

    Stitch vocabulary: chain, single crochet in back loop only.
    Yarn: Aran weight cotton.
    Time: 90 minutes.

    A cup cozy is small, useful, and it introduces back loop only — a texture variation on a stitch you already know. Ribbing looks like a different stitch entirely until you understand it is just single crochet worked into one loop.

    Make it because it is the fastest satisfying object on this list.

    10. Round Floor Cushion — worked in the round

    Stitch vocabulary: chain, double crochet, half double crochet, single crochet decrease.
    Yarn: Bulky weight.
    Time: 6–8 hours.

    The most ambitious thing on this list, and still a beginner project. It is worked in continuous rounds, increases for the disc, then decreases to raise the sides. That is three techniques, each of which you have now met separately.

    Make it last, once you have finished at least three others. It is also the pattern people most often get wrong on the first attempt, and that is fine.

    How to move from these to real skill

    Make two or three of the above before you touch anything else. Repetition is where tension actually becomes consistent — not reading about it. Once your single crochet rows are even without counting twice, move on to double crochet, which triples your row height and changes how everything feels.

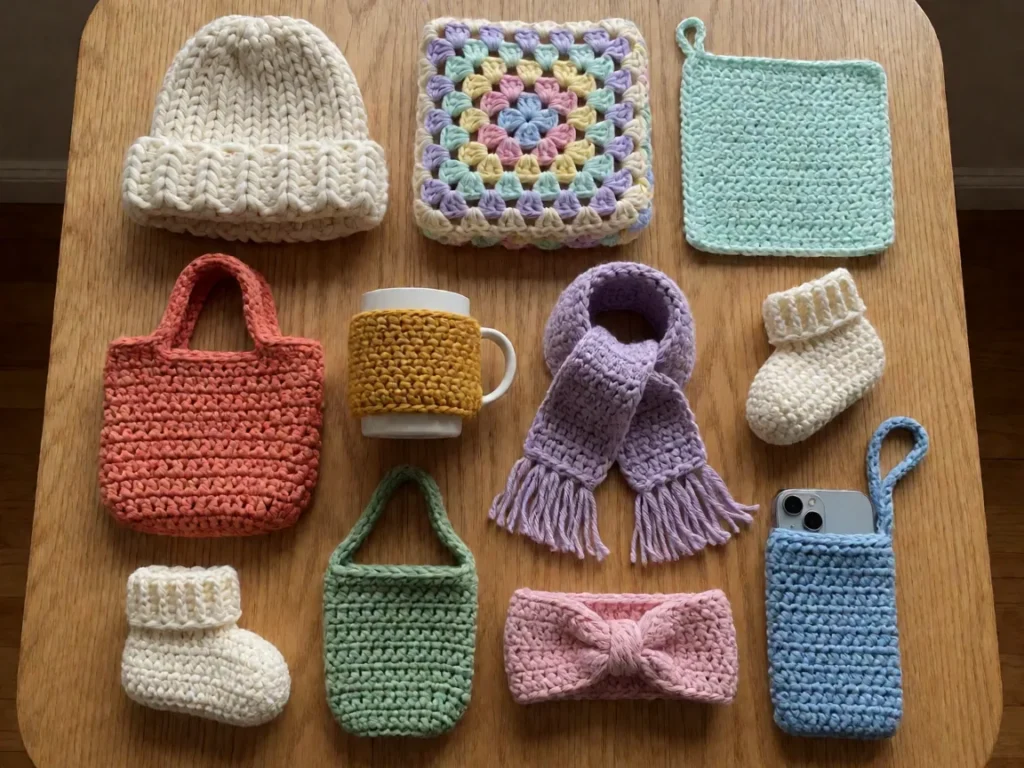
    Ten finished beginner crochet projects laid out on a wooden table including a dish cloth, beanie, bunny plush and cushion

    Two habits worth building from day one. Measure your gauge before starting anything that claims a finished size — it is the least enjoyable step that saves you the most. And read the whole pattern before row one, using our pattern-reading walkthrough, because patterns almost never contradict themselves once you have read ahead.

    Once you have finished something, the roundup that usually comes next is amigurumi patterns — smaller, faster, and the fastest way to build a collection of finished objects.

    Frequently asked questions

    How do I tell whether a pattern is genuinely beginner-friendly?

    Read the abbreviations list before anything else. If it contains nothing beyond chain, single crochet, double crochet and slip stitch, it will teach you something. If it opens with terms like sc3tog, blo or a chart symbol, put it back — not because it is bad, but because you will spend the whole project reading.

    What if my finished piece comes out the wrong size?

    Almost always tension, and always measurable in advance. Check the stated gauge before row one, then measure a 10 cm swatch in the actual yarn with the stated hook size. If your count does not match, change the hook before you change anything else. Our gauge guide covers the arithmetic for recalculating a finished size.

    Should I learn a whole new technique for every project?

    No. Pick two or three projects that share the same stitches and get all three finished. Skills compound when they are applied repeatedly, not when they are collected — a single ambitious pattern that stalls teaches you less than three simple ones you complete.

    Yarn weights quoted in these patterns follow the Craft Yarn Council standard yarn weight system, so the weight class on a ball band means the same thing here as it does in the shop.

    Working through your first one and stuck on something specific? Leave a comment and tell me which pattern and which step — that is the fastest way to get a usable answer.

  • 12 Crochet Blanket Patterns Worth Starting This Weekend

    12 Crochet Blanket Patterns Worth Starting This Weekend

    Every crochet beginner eventually wants a blanket, and most of them start one too early. A blanket is the largest single project in this entire hobby. A baby blanket is around 1,200 stitches. A single-bed blanket can be 60,000. Both feel identical in the first hour and completely different in the twelfth.

    So this roundup is sorted by construction, not by trend. “Cute” is a matter of taste and it tells you nothing about whether you will finish. Construction tells you exactly what skills the project demands and roughly how long it will take, which is the only information that matters on day one.

    Before you commit yarn: check your gauge. A blanket is the one project where being two stitches off per row compounds into a finished size that is nothing like the pattern’s. And pick your yarn using yarn weight rather than colour — weight decides the outcome.

    Why blankets are harder than they look

    Three things make blankets harder than a dish cloth, and none of them are about stitch technique:

    1. Scale. A tension wobble you would never notice on a dish cloth becomes a visible ripple across six feet of fabric.
    2. Boredom. A blanket row is a wall of identical stitches. Your attention will wander and your stitch size will change.
    3. Washing. The finished object goes in a machine. Yarn that felts, thins, or loses drape ruins the work in one cycle.

    Every pattern below is chosen to avoid at least one of those. If a project makes you miserable on day nine, that is information, not weakness — put it down.

    The 12 patterns

    1. Two-Square Baby Blanket — the smallest commitment

    Construction: two granny squares, seamed together.
    Yarn: DK cotton, approx. 400m / 430yd.
    Finished size: 60 × 75 cm (24 × 30 in).
    Time: 8–10 hours over 3 evenings.

    Two squares, joined. That is the entire pattern, and it is enough to teach joining, borders and blocking. It is also the shortest possible route to a blanket you can actually use or gift. Start here.

    2. Four-Square Granny Blanket — the classic

    Construction: four squares, seamed, with a simple border.
    Yarn: DK worsted, approx. 700m / 750yd.
    Finished size: 85 × 110 cm (33 × 43 in).
    Time: 15–18 hours over a week.

    The blanket everyone pictures, and it is genuinely a good first blanket. Four identical squares means you make the same thing four times, so your tension improves as you go and the later squares will be better than the first. Visible seams are part of the look.

    3. Single Crochet Row Blanket — pure flat fabric

    Construction: one piece, worked in straight rows.
    Yarn: Worsted weight, approx. 900m / 980yd.
    Finished size: 100 × 130 cm (39 × 51 in).
    Time: 18–22 hours.

    No seams, no motifs, no shaping. One stitch type for the entire project. If your worry about blankets is that you cannot find your way around them, this removes the problem entirely — a rectangle is always a rectangle, however long it gets.

    4. Single Crochet Round Blanket — one stitch, worked in the round

    Construction: one piece, continuous spirals, joined at the end.
    Yarn: DK worsted, approx. 800m / 875yd.
    Finished size: 110 cm (43 in) circle.
    Time: 20–24 hours.

    A round blanket has no straight edge, which is why it drapes so well and why it cannot be turned wrong-side-out halfway. Spiral joins mean no joining work. The trade-off is that you cannot easily pause and put it down mid-round, so set aside an evening rather than an hour.

    5. Double Crochet Lap Blanket — fastest to make

    Construction: one piece in rows, worked in double crochet.
    Yarn: Aran weight, approx. 800m / 875yd.
    Finished size: 100 × 150 cm (39 × 59 in).
    Time: 10–12 hours.

    Double crochet is three times the height of single crochet, so the same fabric arrives in a third of the rows. This is the fastest substantial blanket here. It is also the least dense and the least warm, which is a reasonable trade for a lap throw.

    6. Moss Stitch Throw — texture, not pattern

    Construction: one piece in rows, single crochet and chain alternating.
    Yarn: Aran weight, approx. 900m / 980yd.
    Finished size: 120 × 150 cm (47 × 59 in).
    Time: 16–20 hours.

    Moss stitch is a two-row repeat: a row of single crochet, then a row of chains. Visually it produces a pebbled texture that hides tension variation better than any flat stitch. If you are worried about visible ridges, this is the pattern that forgives most.

    7. Chevron Baby Blanket — colourwork, flat

    Construction: one piece in rows, two colours per row.
    Yarn: DK cotton, approx. 600m / 655yd.
    Finished size: 75 × 90 cm (30 × 35 in).
    Time: 14–16 hours.

    Chevrons are a two-stitch pattern that produces a strong zigzag. The colour changes at the end of each row are the only added mechanic. It looks considerably more advanced than it is, which is exactly why it makes a good confidence project.

    8. Granny Stripe Blanket — rounds plus joins

    Construction: rectangular granny stripes, worked in rounds then seamed.
    Yarn: Aran weight, approx. 1,100m / 1,200yd.
    Finished size: 130 × 170 cm (51 × 67 in).
    Time: 28–34 hours over 2 weeks.

    Long coloured stripes joined in pairs, then joined again. It asks for real stamina and produces a full-size throw. This is where you find out whether you actually enjoy long projects — worth knowing before you buy a metre of every colour in the shop.

    9. Filet Crochet Blanket — the biggest commitment

    Construction: one piece in rows, double crochet and chain mesh.
    Yarn: Sport weight cotton, approx. 1,400m / 1,530yd.
    Finished size: 130 × 170 cm (51 × 67 in).
    Time: 40–50 hours over 3 weeks.

    Filet is a mesh of chains and double crochet, so it is fast per row but there are an enormous number of rows. It is the lightest and most breathable blanket here, and the most portable — many people work a lap version instead. Do not attempt this before you have finished one item from the beginner roundup without frustration.

    10. Houndstooth Blanket — technical colourwork

    Construction: one piece in rows, two colours carried across rows.
    Yarn: Worsted weight, approx. 1,000m / 1,090yd.
    Finished size: 120 × 150 cm (47 × 59 in).
    Time: 35–45 hours.

    Houndstooth is a four-row colour sequence, which sounds simple until you have to carry two colours across a 150 cm row. It is genuinely one of the harder colourwork patterns and the result is unmistakably professional. Attempt it after two other colourwork pieces.

    11. Afghan Stitch Throw — clusters, texture, speed

    Construction: one piece in rows, three stitches worked as a cluster.
    Yarn: Bulky weight, approx. 600m / 655yd.
    Finished size: 110 × 150 cm (43 × 59 in).
    Time: 8–10 hours.

    Afghan stitch groups three stitches into a textured cluster, so it covers a lot of ground very quickly. It is the shortest route to a full-size throw here, at the cost of using up yarn fast. A good confidence project if single crochet rows are already comfortable.

    12. Waffle Stitch Blanket — the one you should grow into

    Construction: one piece in rows, post stitches around front and back posts.
    Yarn: Aran weight, approx. 1,000m / 1,090yd.
    Finished size: 130 × 170 cm (51 × 67 in).
    Time: 30–36 hours over 2 weeks.

    Waffle stitch works stitches around posts rather than into tops, creating deep pockets. It is thick, warm and structurally interesting. It is also the most demanding technique on this page, and the pattern most worth growing towards over a season rather than starting on a Saturday.

    Close-up of a granny stitch crochet blanket showing the clustered square pattern and colour joins

    Which one should you actually make?

    If you have Make
    Never finished a blanket 1 or 2
    Tension drifts after 20 rows 3 or 6
    Want the fastest full-size throw 5 or 11
    Want something to gift this month 1 or 7
    Have done colourwork before 7 or 10
    Want a project for a whole month 8, 9 or 12

    Before you buy yarn

    Three checks, in this order:

    1. Buy the weight class, not the brand. If the pattern says DK, any DK yarn works. If the pattern names a specific yarn, treat it as a suggestion unless it says “substitute with”.
    2. Buy one extra ball. Dye lots vary, and a ball from a different lot in the middle of a blanket is visible. A spare ball also protects you from the discovery that you were 30 metres short.
    3. Wash a swatch first. Ten minutes in a washing machine tells you whether the blanket survives being washed. Some of the most beautiful yarn in this hobby felts.

    Our guide to choosing yarn for crochet covers what each weight class does to gauge and drape, and how to substitute safely.

    Frequently asked questions

    Which yarn weight makes the easiest first blanket?

    Light or light worsted. A fine yarn shows every mistake you make, which sounds discouraging but is exactly what makes it forgiving — the stitch pattern disguises tension that a chunky yarn turns into visible wobble. Working in a heavier yarn, the fabric hides errors until the final row, which is the least useful time to find them.

    How much yarn should I buy?

    Take the pattern’s stated yardage and add ten per cent. Dye lots vary between batches, and a stripe that came from a different skein is visible across a large flat piece. The extra also covers the swatch you should be making first.

    Can I use a different yarn at the same weight?

    Usually yes for a single weight, never across fibre on something fitted. Same weight and a similar construction behaves predictably; different fibre does not, which is why wool and cotton do not substitute for each other on a garment. When you do substitute, swatch it and re-check your gauge before committing to the whole panel.

    Weight classes referenced across these patterns use the Craft Yarn Council standard yarn weight system, so a band labelled “medium” means the same density wherever you buy it.

    Choosing between two yarns and unsure which suits the project? Leave a comment with the pattern and the two weights — I will tell you which one to buy.